Contents
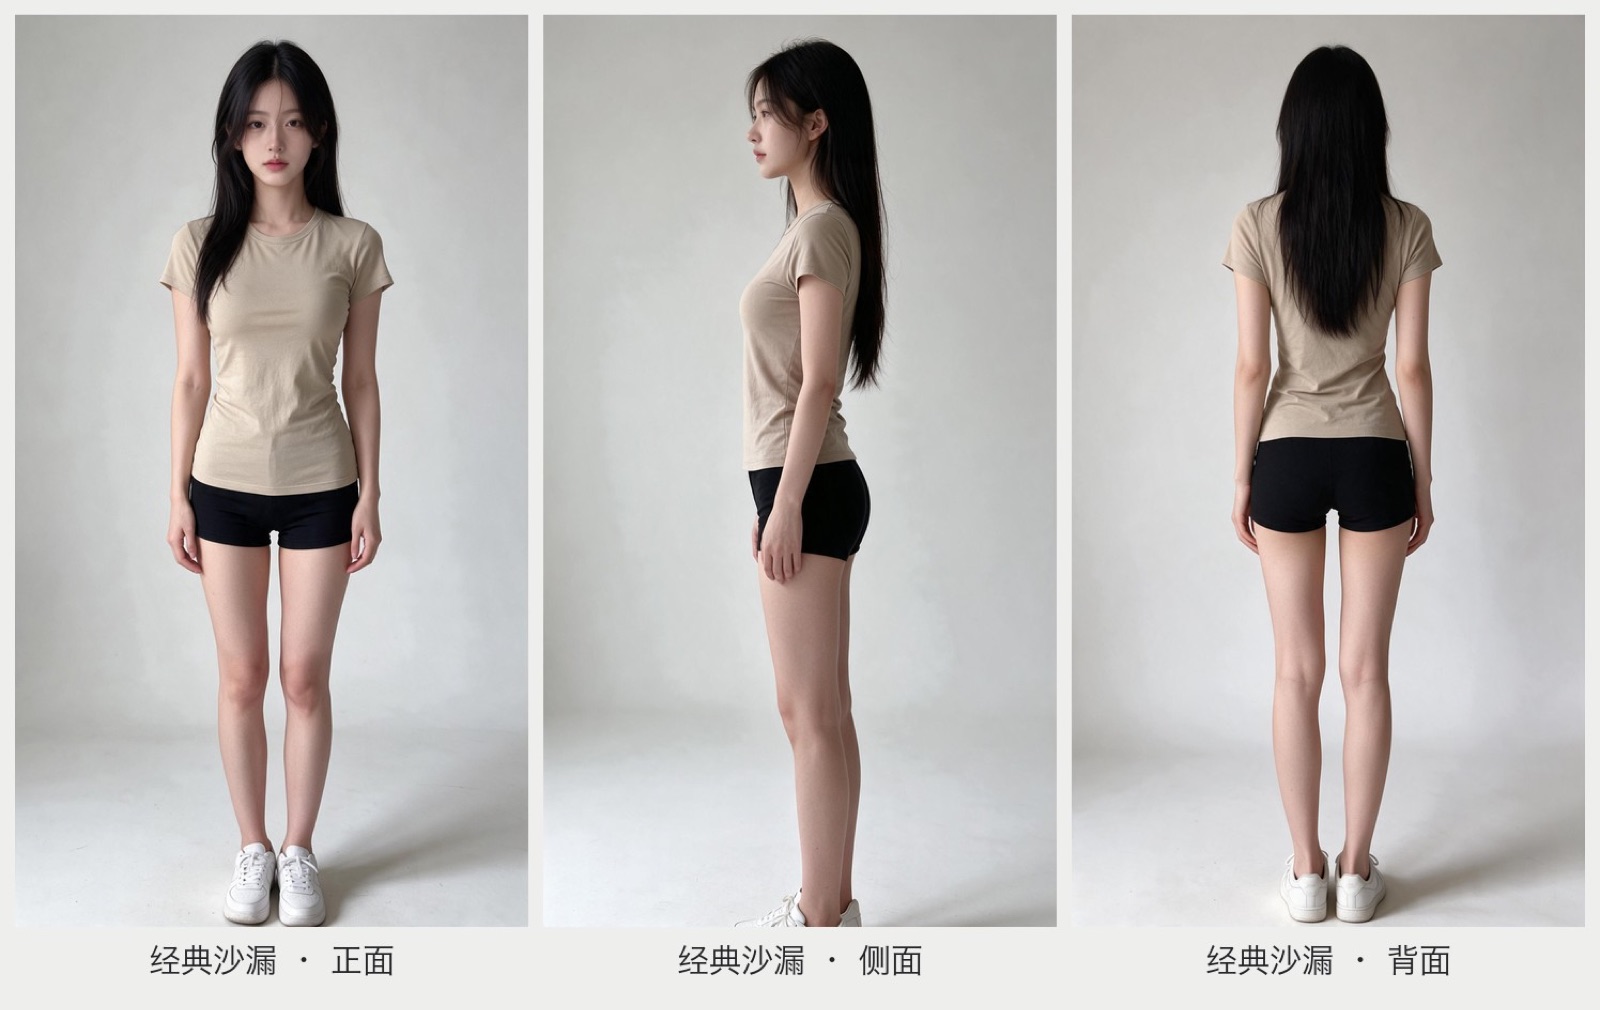
- Six Body Types: Front View Comparison
- The Core Principles
- Setup & Preparation
- Model & Settings
- Choosing the Reference Photo
- Lock Down Every Other Variable
- Splitting Prompts into 8 Modules
- Dialing in Virtual Human Proportions
- Understanding Head-to-Body Ratio
- The Head-to-Body Test
- Quick Visual Sanity Checks
- Descriptions for All 6 Body Types
- 1. Classic Hourglass
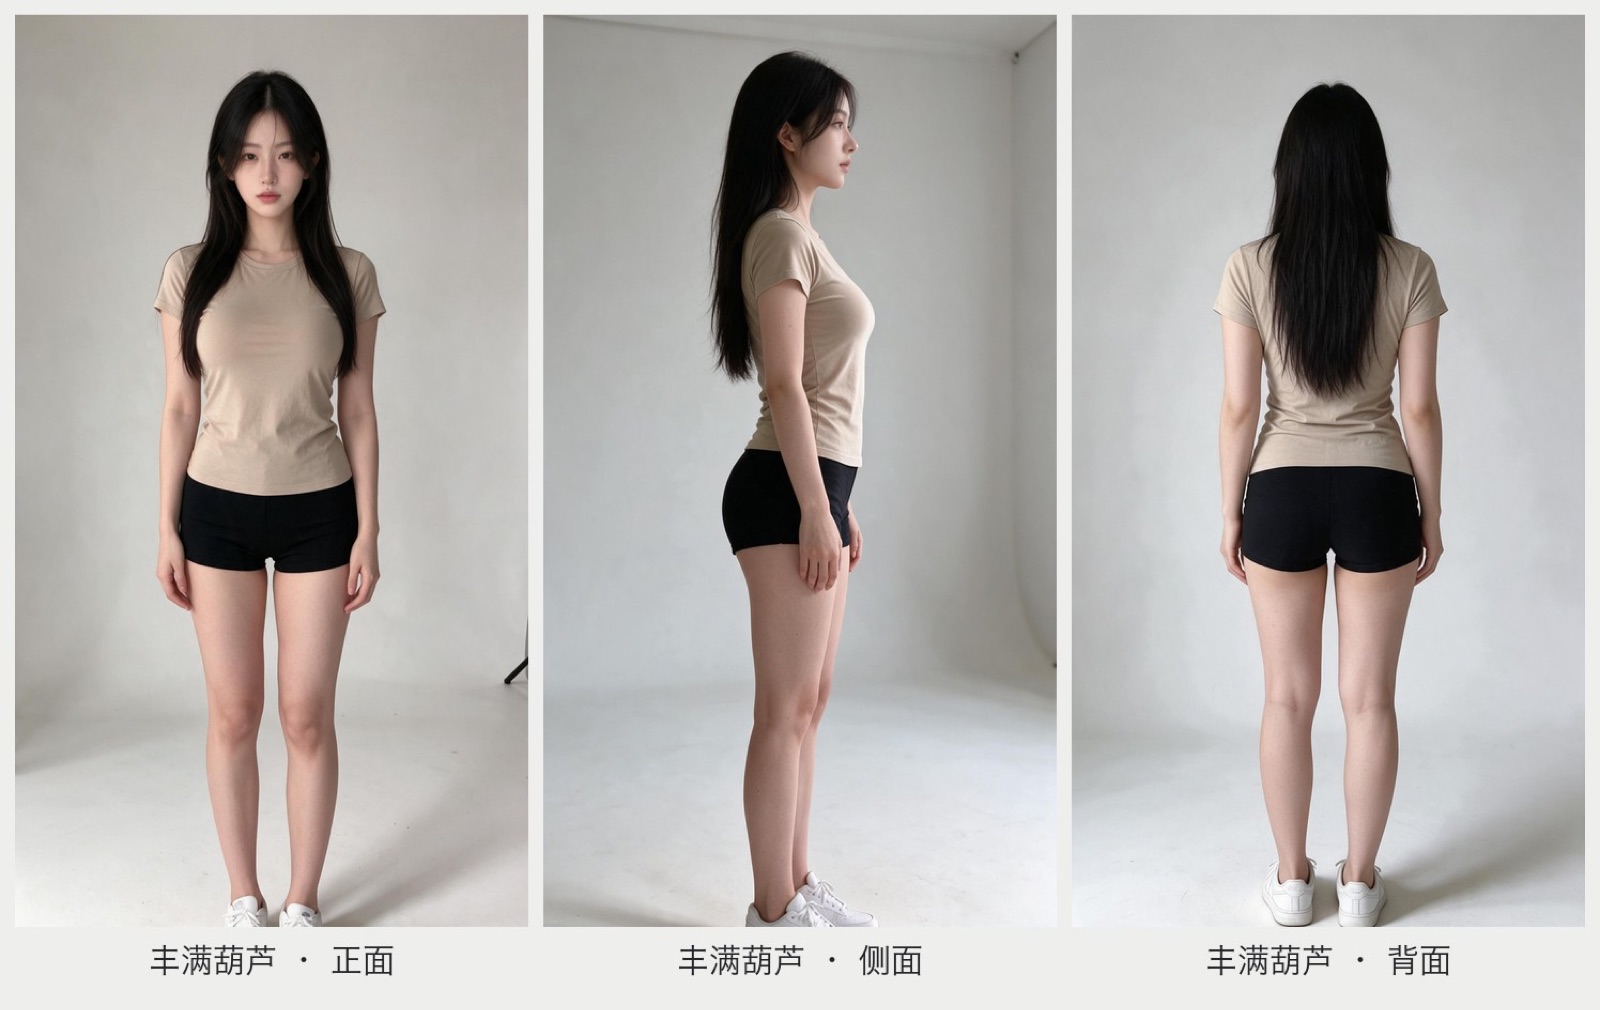
- 2. Curvy Hourglass
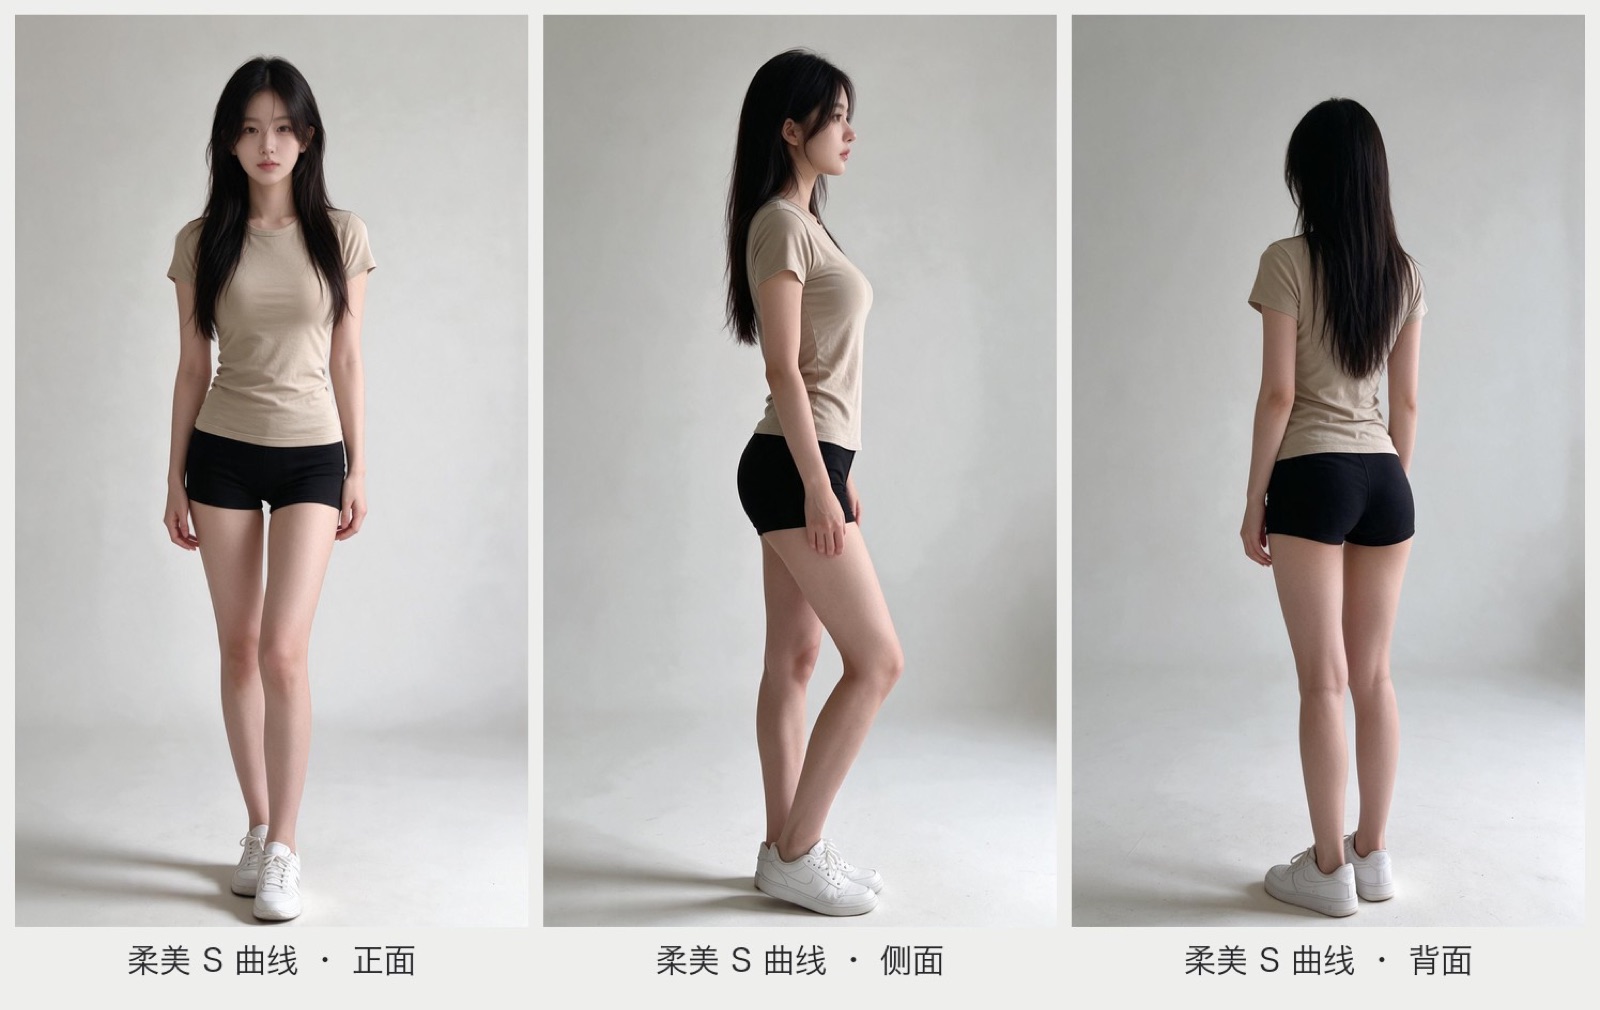
- 3. Graceful S-Curve
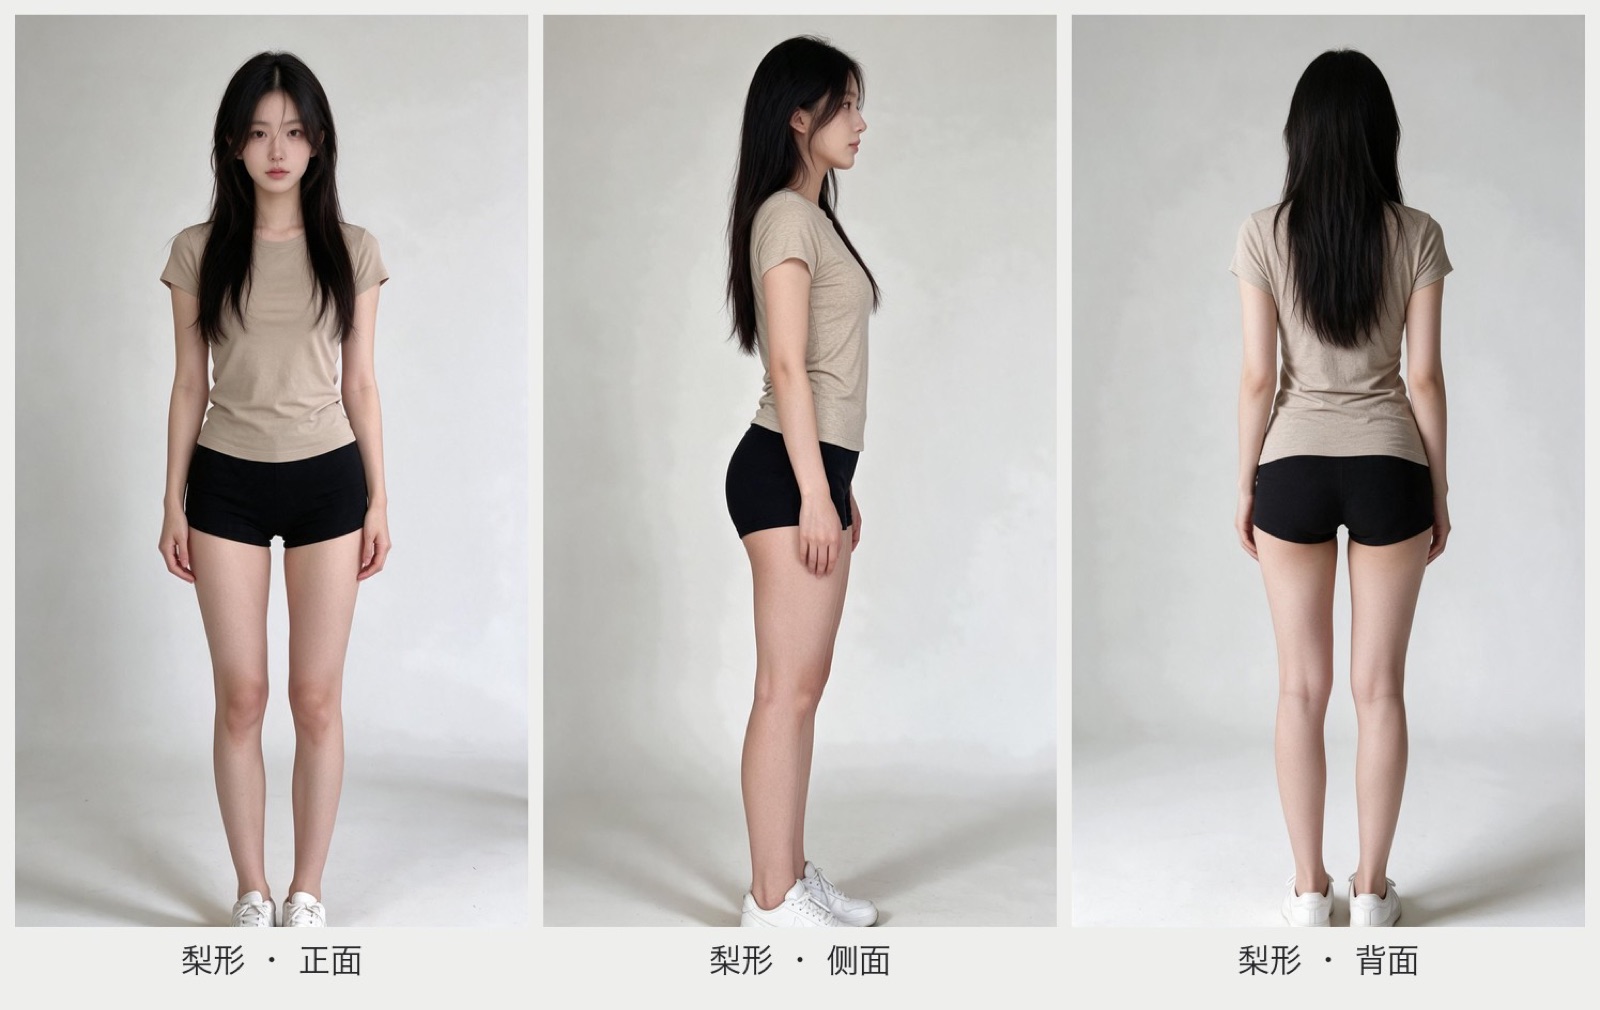
- 4. Pear Shape
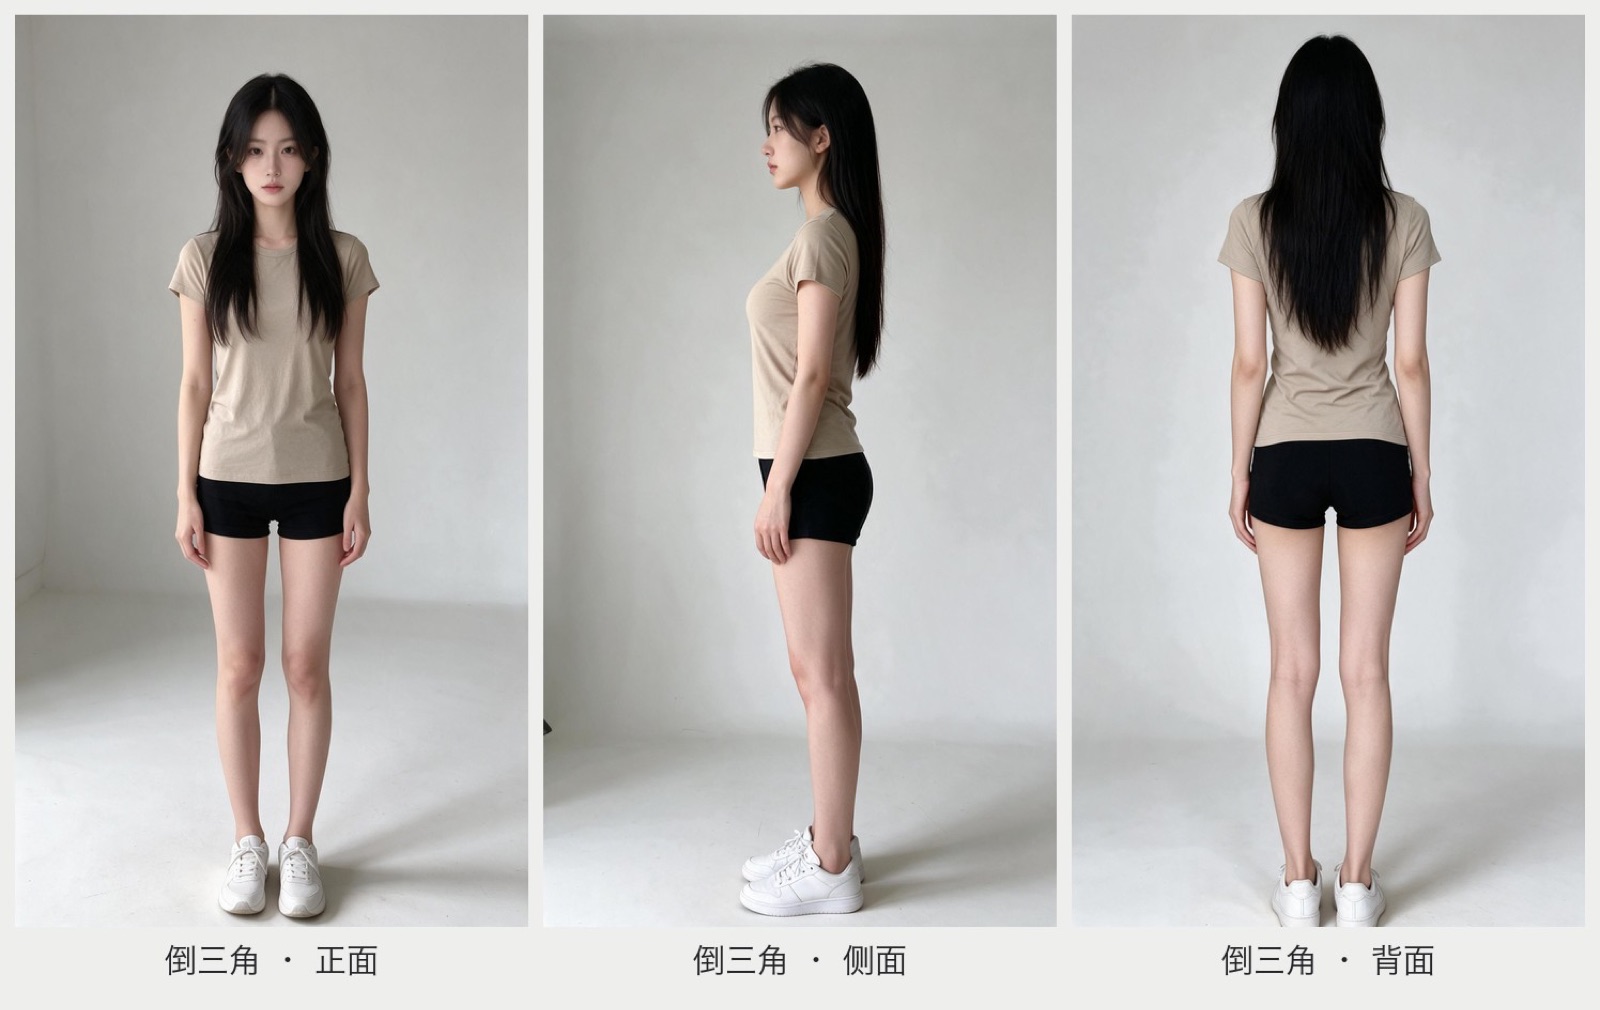
- 5. Inverted Triangle
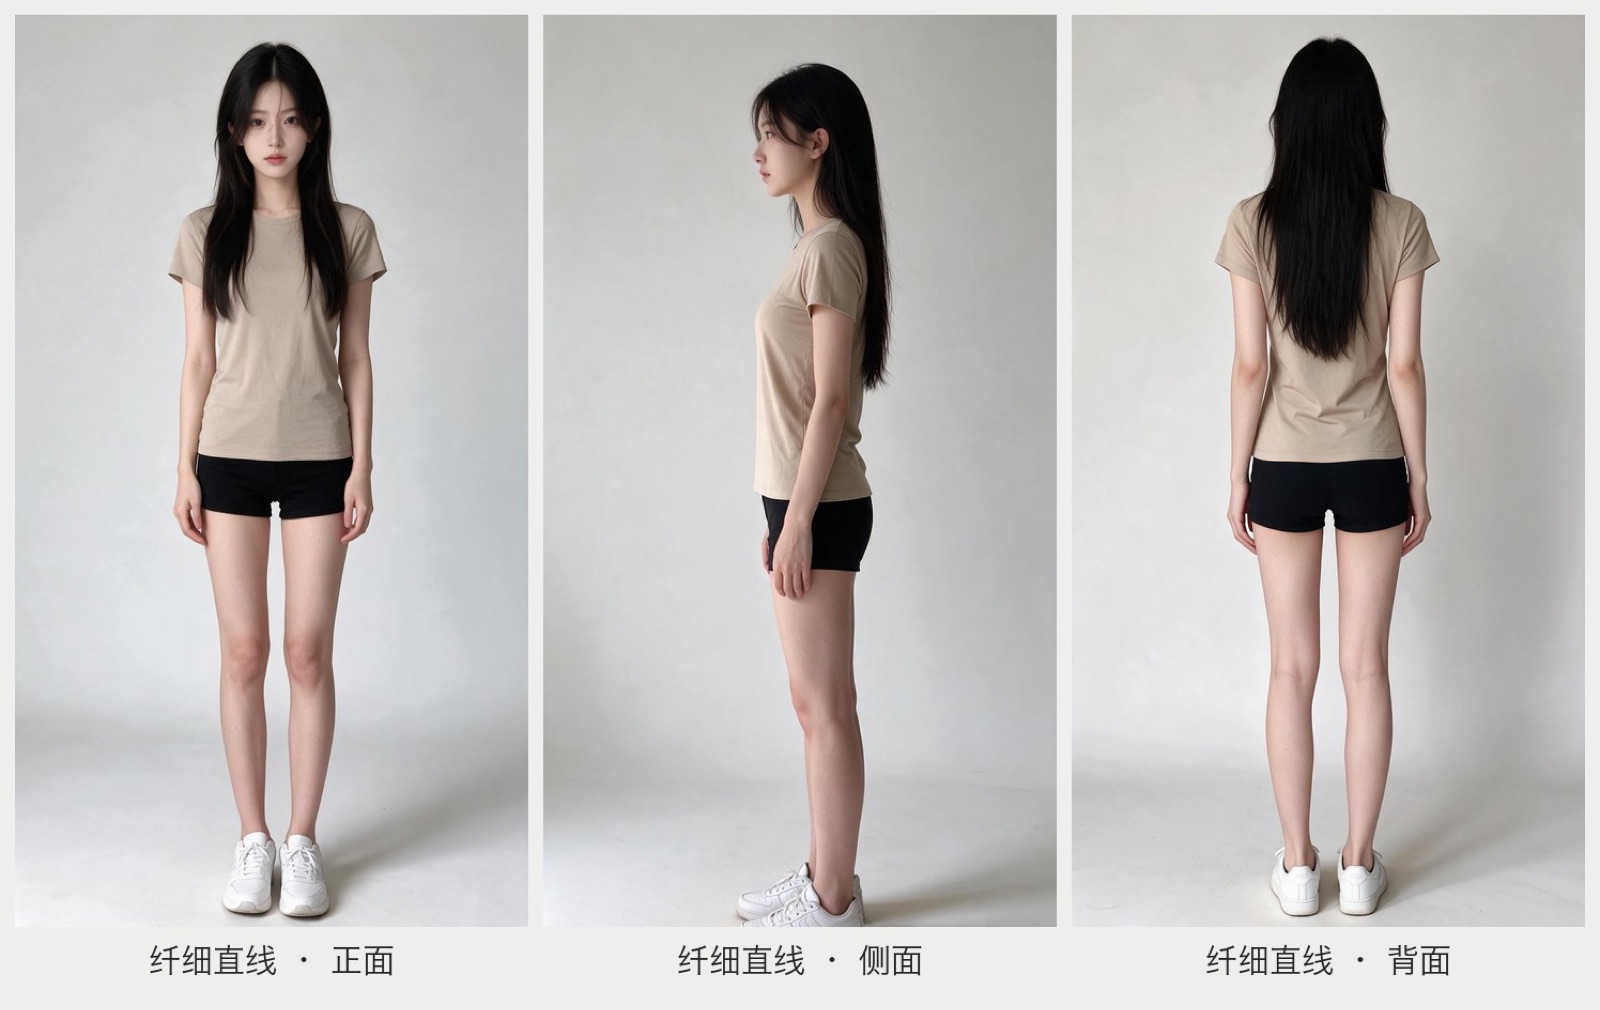
- 6. Slim Straight (Column)
- Evaluating Angles & Pairwise Comparisons
- 8 Common Mistakes & Fixes
- Adapting This to Your Own Virtual Human
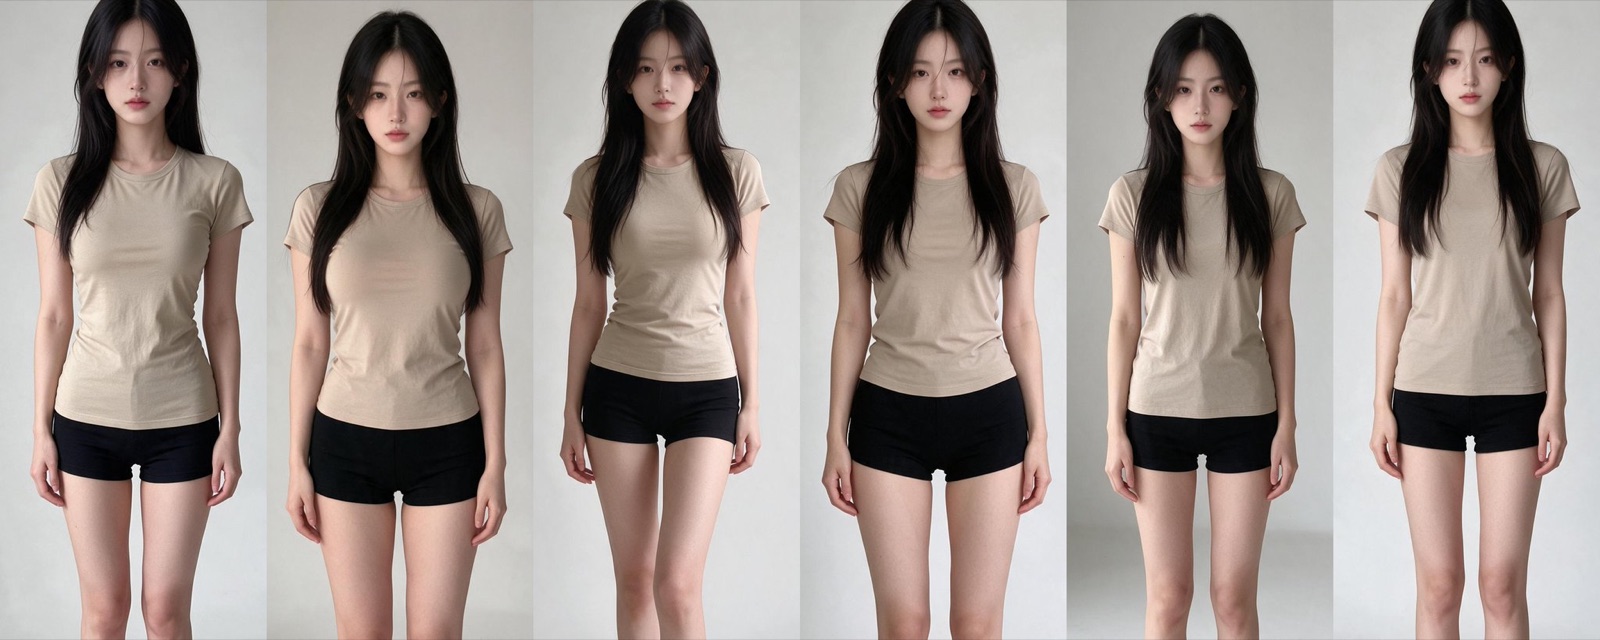
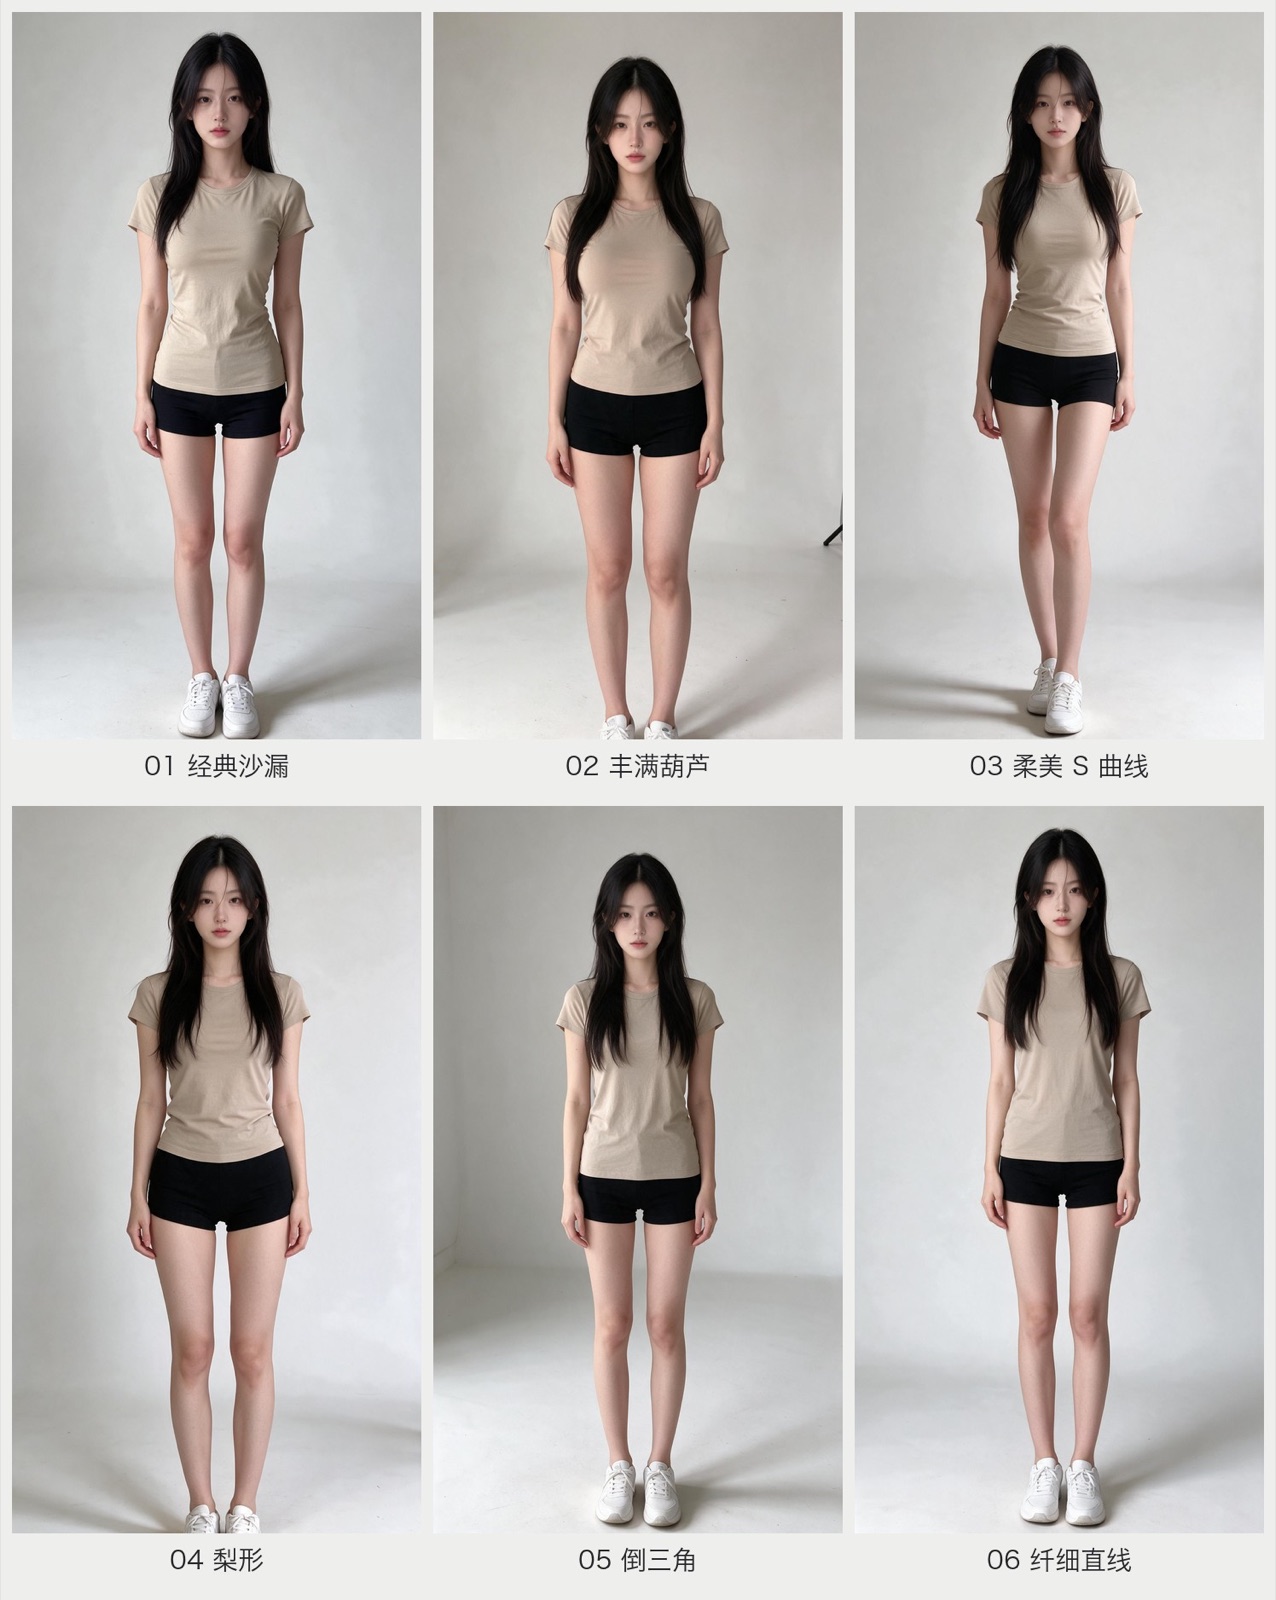
The same virtual character, six body types, across front, side, and back angles—18 images in total, with zero facial drift. The entire workflow relied on a single reference photo and Seedream 5.0 Pro. This guide breaks down the full workflow: the exact modular prompt template, how to dial in proportions, what causes generations to fail, and how to apply this to your own reference photos.
Six Body Types: Front View Comparison
The Core Principles
Keeping 18 images rock solid comes down to three rules:
- Lock the face with an image reference. Every single generation uses the same base reference photo via image-to-image. Generating purely from text will invent a brand-new face every time.
- Control body types with modular prompts. The prompt is broken down into 8 fixed modules. You only swap out module 4 (the body description).
- Change only one variable at a time. Each image tests one specific body type and one camera angle. The face, outfit, background, and camera setup remain strictly untouched.
Everything below expands on these three rules. If you only want the prompts, jump directly to the six body type descriptions.
Setup & Preparation
Model & Settings
I used Seedream 5.0 Pro (accessible via Doubao or the Volcengine Ark API). My generation parameters:
- Mode: Image-to-Image (upload reference photo)
- Aspect ratio: 9:16 vertical
- Resolution: 1536×2730
- Batch size: 1 image per run (inspect immediately, re-roll if needed)
Choosing the Reference Photo
The reference photo is the single source of identity for the entire set—all 18 images follow its facial features.
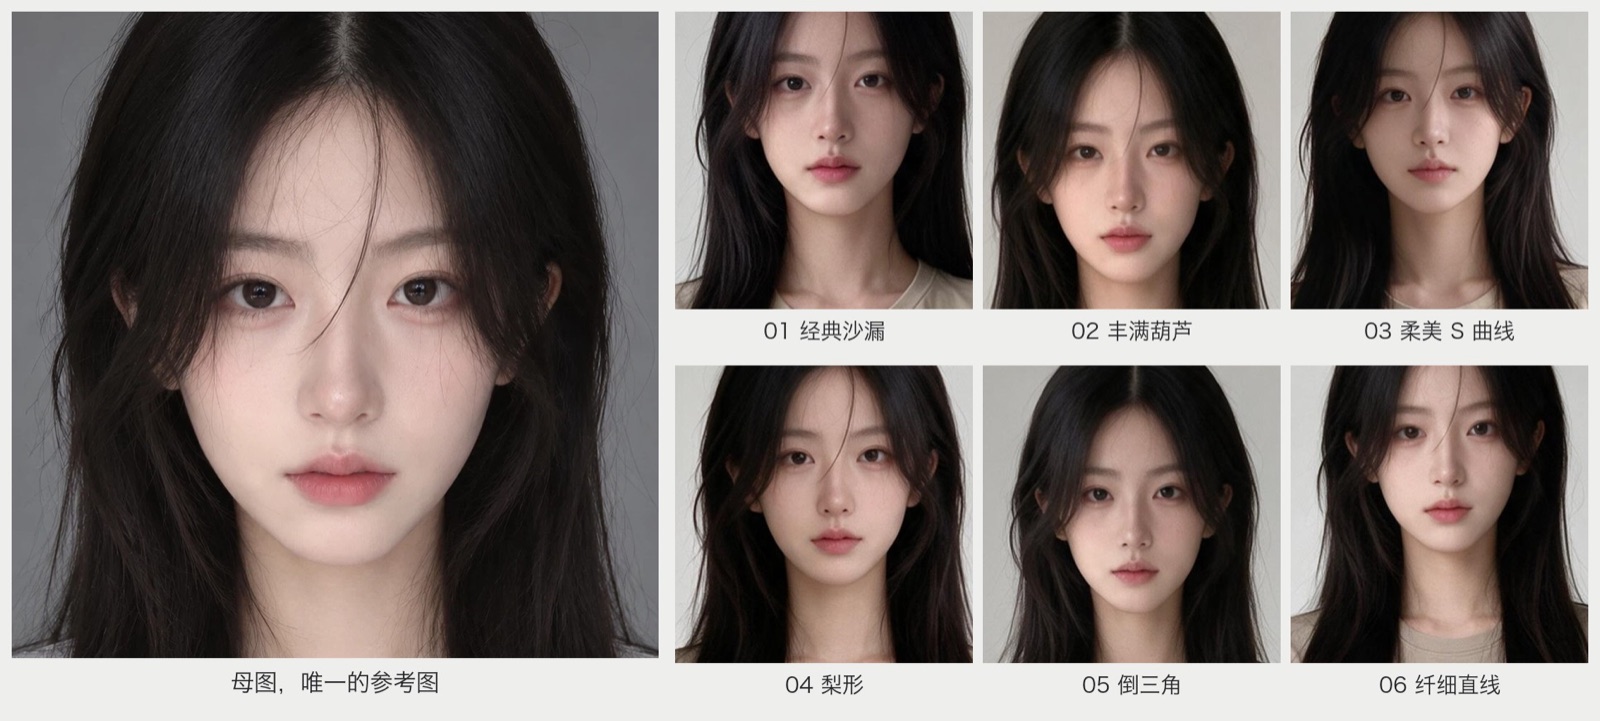
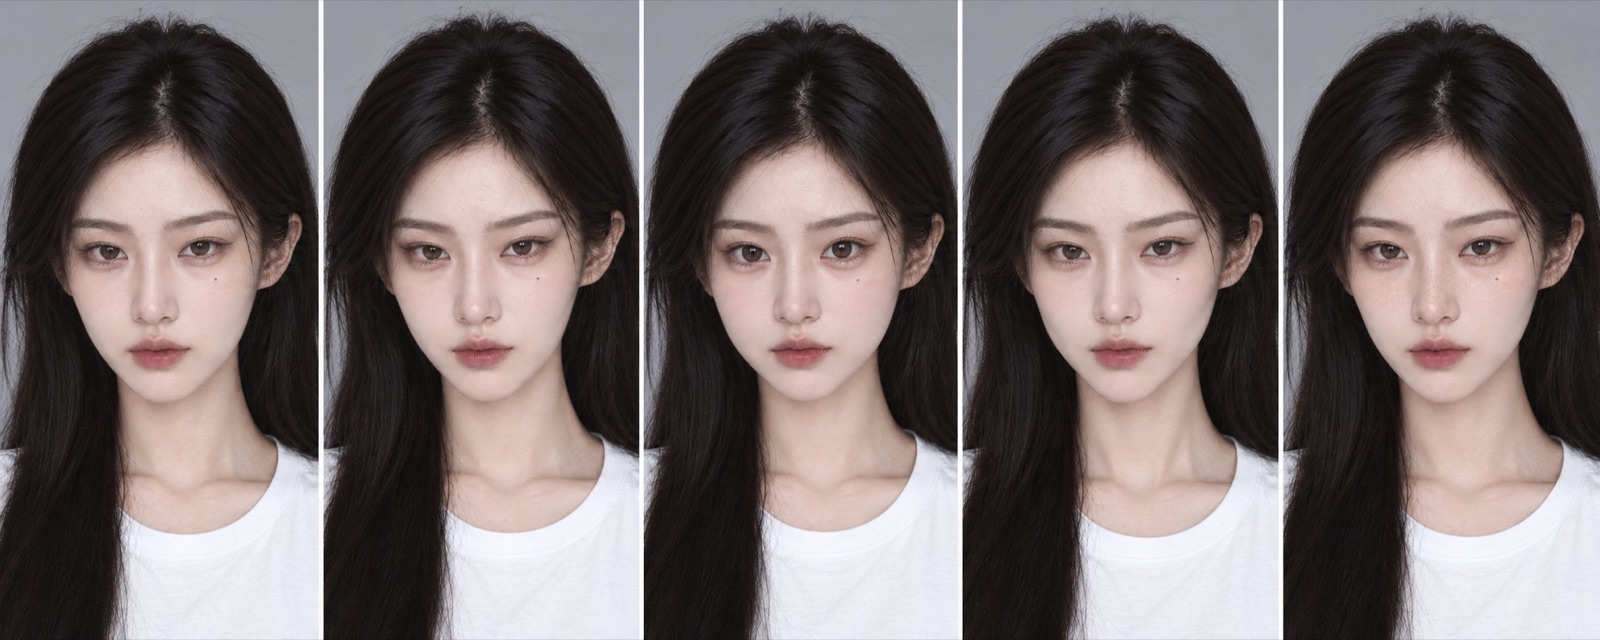
My reference is a front-facing headshot against a neutral grey wall, wearing a simple white tee under flat, even lighting. In the final outputs, the outfit, background, and shot composition all changed completely, yet the face stayed consistent across all six body types.
Three criteria for selecting a reference image:
- Front-facing with unobstructed features (no hands or thick hair hiding the face)
- Even, diffused lighting without heavy shadows
- A bust shot or medium portrait is plenty; no full-body reference needed
I tested two different reference photos: one was a moody selfie in dim lighting, and the other was this flat-lit studio portrait. Both worked, but the flat, neutral portrait proved far more reliable. When picking a reference photo, choose clean and neutral over heavy aesthetic atmosphere.
Lock Down Every Other Variable
To accurately compare body types, every other visual element must remain frozen—otherwise, you can’t tell whether a difference comes from the body type or the clothes and camera lens.
- Subject: ~22-year-old adult woman, visual height ~175cm
- Wardrobe: Light khaki fitted crew-neck short-sleeve tee, black fitted shorts, white low-top sneakers
- Setting: Neutral off-white studio backdrop, soft diffused natural daylight
- Lens: Full-frame 50mm standard lens perspective, eye-level camera height, zero wide-angle distortion, head-to-shoes fully framed
Fitted clothing is deliberate: loose or oversized clothes drown out the waist and hips, completely defeating detailed body prompts.
Splitting Prompts into 8 Modules
A complete prompt runs several hundred words. Editing it as a single block makes it too easy to accidentally break consistency. Instead, I split it into 8 modular blocks:

Among the 8 modules:
- Only Module 4 (Body features) changes between body types.
- Module 1 (Framing/Perspective) and Module 6 (Angle/Pose) adjust for front, side, or back angles.
- The remaining 5 modules never change a single word.
This modularity makes debugging trivial. If the face drifts, strengthen Module 2. If the body differentiation is weak, adjust Module 4. Changing multiple blocks simultaneously leaves you guessing which tweak actually helped or hurt.
Here is the complete prompt for the Classic Hourglass (Front View), assembled from all 8 modules:
Prompt:
Using the adult female virtual human in the reference image as the sole character identity, generate a 9:16 vertical, ultra-realistic full-body photographic portrait, standard front-facing eye-level perspective. Strictly preserve the reference character’s facial structure, bone structure, facial feature proportions, eye shape, nose shape, lip shape, skin tone, long straight black hair, hair color, and apparent age of approximately 22 years old; maintain high personal identity consistency, no face swapping, no beauty filter smoothing, no generic social media influencer appearance. Height approximately 175cm, tall and slender silhouette, naturally realistic 7.5 to 8 head-to-body ratio, head well-proportioned with shoulder width, ribcage, pelvis, and limbs; long well-structured legs, waistline positioned at realistic anatomical height; strictly avoid short legs, oversized head, ratios exceeding 8.5 heads, or joint deformities. This frame features a front-facing, high-contrast Classic Hourglass silhouette: shoulder width and hip width are virtually equal with moderate breadth, full bust, pronounced waist indentation with waist circumference visibly smaller than bust and hips, creating an instantly recognizable clear X-line waist taper; balanced pelvis, rounded hips, natural healthy thigh contours, slender calves; wearing a fitted light khaki crew-neck short-sleeve t-shirt that visibly cinches at the waist to emphasize the X-contour of bust-waist-hips, do not soften or flatten the waistline. Black fitted shorts, white low-top sneakers. Standing facing the camera, shoulders relaxed and level, arms hanging naturally close to sides without blocking the waist and hip silhouette, legs straight and together. Off-white minimalist indoor photography studio, soft and uniform diffused daylight, natural 50mm full-frame standard lens perspective, eye-level framing, no wide-angle, no low-angle upward tilt, no vertical distortion, head to shoes fully visible in frame. Authentic iPhone photography texture, preserving fine skin pores and fabric wrinkles. Negative constraints: oversized head, short legs, unnaturally tiny waist, joint distortion, text, watermark, collage.
Module 2 (Identity Lock) is the most critical block. Never remove it. For side and back angles where the full face isn’t visible, replace it with this side-profile version:
【Prompt, Side/Back Angle Identity Lock】Preserve the reference character’s long straight black hair, hair color, fair skin tone, side facial profile, and apparent age of approximately 22 years old; maintain character identity intact.
Dialing in Virtual Human Proportions
Proportions are where virtual humans fail most often. Stumpy legs, bobblehead proportions, or overly elongated torsos will ruin the output regardless of how well the body type is described.
Understanding Head-to-Body Ratio
Head-to-body ratio uses the head height (from crown to chin) as a measuring unit. Average adults are around 7 heads tall; fashion illustration often reaches 8 or 9 heads for stylistic leg length.
For realistic virtual humans, I specify 7.5 to 8 head-to-body ratio in the prompt, reinforced with negative constraints: prohibit short legs, oversized head, exceeding 8.5 head ratio.
The Head-to-Body Test
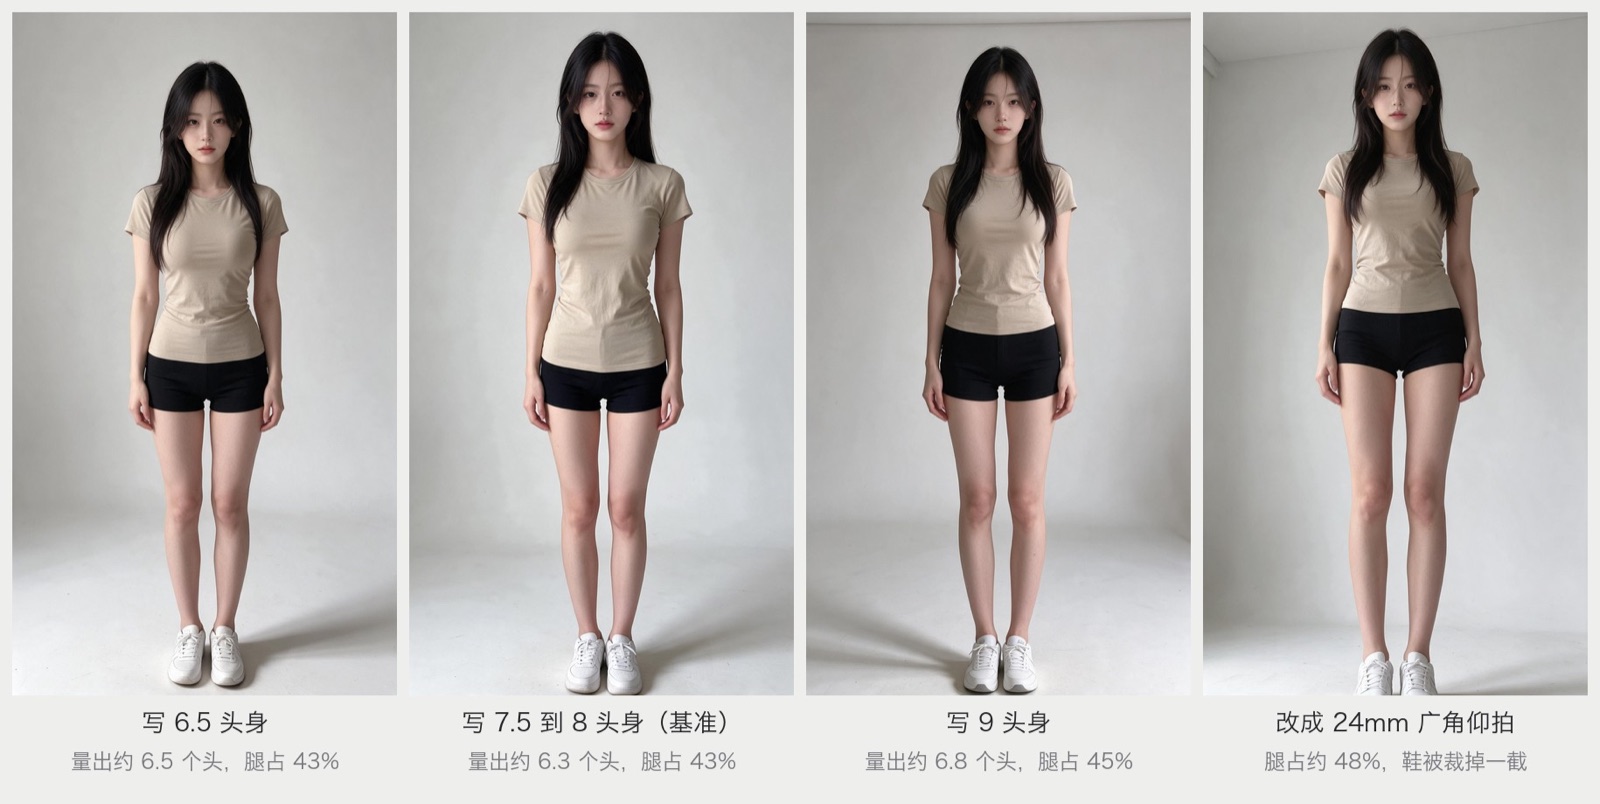
To see whether explicit numbers actually steer the model, I ran a test on the classic hourglass front view holding everything constant and modifying only the proportion phrase:
- Changed to:
height ~160cm, 6.5 head-to-body ratio - Baseline:
7.5 to 8 head-to-body ratio - Changed to:
height ~180cm, 9 head supermodel proportions, petite head, ultra-long legs - Kept ratio fixed, changed camera to:
24mm ultra wide-angle shot upward from knee height
Measuring the generated outputs (from crown to shoe soles):
- Prompted 6.5 heads -> Measured ~6.5 heads, legs ~43% of total height
- Prompted 7.5-8 heads -> Measured ~6.3 heads, legs ~43% of total height
- Prompted 9 heads -> Measured ~6.8 heads, legs ~45% of total height
- Wide-angle low shot -> Legs jumped to ~48% of total height, but shoes were clipped
The result: prompting 6.5 vs 9 heads changed measured proportions by less than half a head. Diffusion models don’t follow mathematical head ratios strictly; they pull results back toward plausible human anatomy.
Treat the head-to-body prompt phrase as a safety guardrail rather than a precision slider—it prevents caricatures, but won’t fine-tune millimeters. The real tool for lengthening legs is camera positioning: the low-angle wide shot added 5 percentage points of relative leg length, at the cost of slight perspective distortion and clipped footwear.
Quick Visual Sanity Checks
Since numbers aren’t absolute, inspect your outputs against standard anatomical markers:
- The narrowest point of the waist sits roughly level with the elbows.
- With arms hanging naturally, fingertips reach roughly mid-thigh.
- The knees sit roughly halfway between the hip joint and the bottom of the feet.
- Shoulder width for women is roughly two head-widths wide.
If an image fails these checks noticeably, re-roll. For instance, if the knees render too low, the thighs look elongated, the shins look compressed, and the character looks unexpectedly short.
Descriptions for All 6 Body Types
Module 4 determines how each body type renders. Below are the specific descriptions used for the front view of each archetype:
1. Classic Hourglass
Balanced shoulders and hips, distinct narrow waist, classic X-silhouette. The easiest archetype to generate reliably.
Body Module: Front-facing, high-contrast Classic Hourglass silhouette: shoulder width and hip width are virtually equal with moderate breadth, full bust, pronounced waist indentation with waist circumference visibly smaller than bust and hips, creating an instantly recognizable clear X-line waist taper; balanced pelvis, rounded hips, natural healthy thigh contours, slender calves; wearing a fitted light khaki crew-neck short-sleeve t-shirt that visibly cinches at the waist to emphasize the X-contour of bust-waist-hips, do not soften or flatten the waistline.
The phrase do not soften or flatten the waistline is essential—without it, the t-shirt drape will smooth out the waist taper. Side and back angles showcase the waist indentation even more clearly.
2. Curvy Hourglass
A fuller variation of the hourglass: more pronounced bust and hips, narrower waist. Most evident from the side profile.
Body Module: Front-facing full, shapely, distinctly curved hourglass silhouette: full bust, slender waist with pronounced abdominal taper, full rounded hips with wider pelvis, pronounced circumference contrast between bust, waist, and hips; curvaceous yet healthy, natural, and realistic, well-proportioned without exaggeration, slender balanced legs.
This archetype can easily trigger safety filters or anatomical distortion if described with extreme language. Always anchor it with healthy, natural, realistic human anatomy. For back angles in particular, avoid words like “extreme flare” or “hyper-wide”—use slender waist, full rounded hips, smooth gentle hip curve, natural proportions.
3. Graceful S-Curve
The secret here is pose rather than exaggerated measurements.
Body Module: Body weight resting primarily on one leg with the other leg relaxed slightly forward, hips gently tilted to one side, torso and hips creating subtle counter-rotation with a 15-degree body turn, naturally revealing three-dimensional curves between bust, waist, and hips in a front-facing perspective; maintaining healthy anatomical spinal and pelvic alignment, no exaggerated swayback, no hollow chest, no hyper-extended lumbar curve.
Shifting the center of gravity to one leg while introducing a slight torso turn lets the natural curve emerge effortlessly. The negative prompt against excessive swayback prevents artificial unnatural postures.
4. Pear Shape
Narrow shoulders, slender waist, wider hips and fuller thighs—a distinct A-line silhouette.
Body Module: Pelvis and hips visibly wider than shoulder width, hips flaring outwards distinctly, rounded hips, fuller thighs, fitted black shorts clearly defining the wide pelvic outline and fuller upper thighs, contrasting against narrow shoulders to form an unmistakable A-line silhouette; maintaining tall and slender proportions, avoiding extreme artificial hip dips or stoutness.
Because the hem of the tee naturally ends near the widest part of the hips, you must explicitly prompt the black shorts to define the pelvic transition.
5. Inverted Triangle
Broad shoulders, narrow hips, lean legs—the direct inverse of the pear shape.
Body Module: Shoulders distinctly broad, straight, and relaxed, shoulder width visibly exceeding hip width, broad clavicle and shoulder structure, t-shirt shoulder seams extending outward, broad ribcage with moderate natural bust; waist tapering naturally, pelvis and hips noticeably narrower than shoulders, compact hips, lean thighs and calves, presenting a clear inverted-triangle silhouette; preserving soft feminine contours, avoiding exaggerated muscular bulk or masculine broadness.
Broad shoulders must be established through shoulder seams extending outward and fabric structure rather than shrugging. Preserving soft feminine contours is mandatory to keep the model from rendering a bodybuilder back.
6. Slim Straight (Column)
Shoulders, waist, and hips all share roughly equal width—the sleek H-silhouette.
Body Module: Horizontal width of shoulders, waist, and hips virtually identical, modest bust, slender ribcage, straight waistline without inward cinching, flat abdomen, balanced pelvis, compact straight hips; uniform column-like width from chest down through hips without dramatic indentation, establishing a clean H-silhouette; slender limbs while retaining healthy natural muscle tone and body fat, avoiding sickly emaciation or protruding skeletal bones.
Realistic models naturally want to add a waist indentation to female subjects. You have to reinforce column-like width without waist taper. At the same time, specifying retaining healthy natural muscle tone prevents the character from rendering gaunt.
Evaluating Angles & Pairwise Comparisons
When comparing all six front views side-by-side, some archetypes seem subtle. That is normal: image models tend to pull extreme shoulder and hip widths back toward a safe median to prevent distortion.
Examine all three angles:
- Front: Overall silhouette—who tapers at the waist, who widens at the top, who forms a straight column.
- Side: Front-to-back depth—curvy hourglass has the most depth, S-curve is the most fluid, straight column has minimal variation.
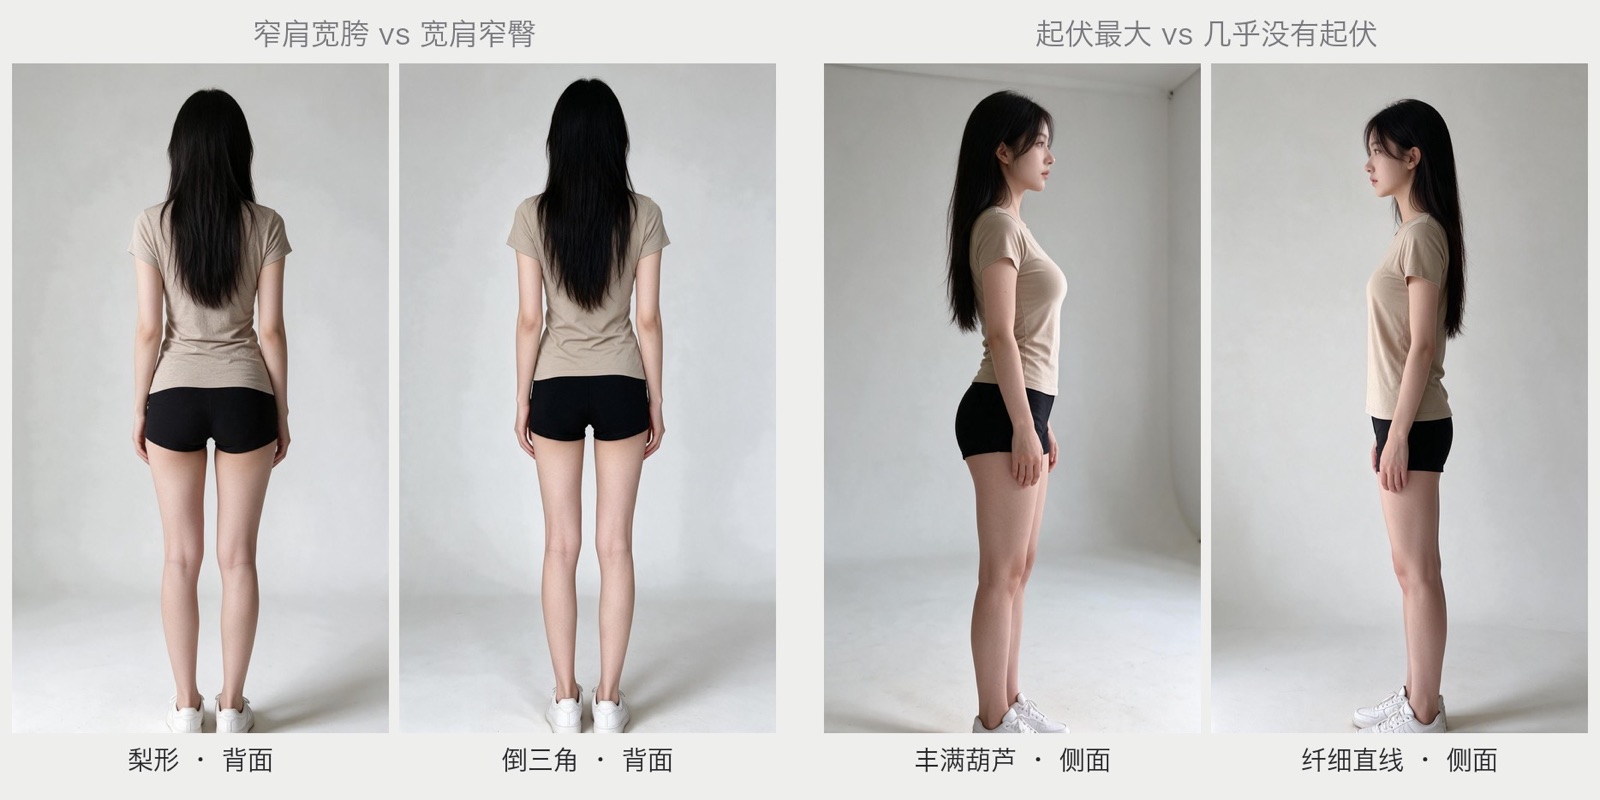
- Back: Shoulder-to-hip ratio—pear is widest at the bottom, inverted triangle is widest at the top, straight column is uniform.
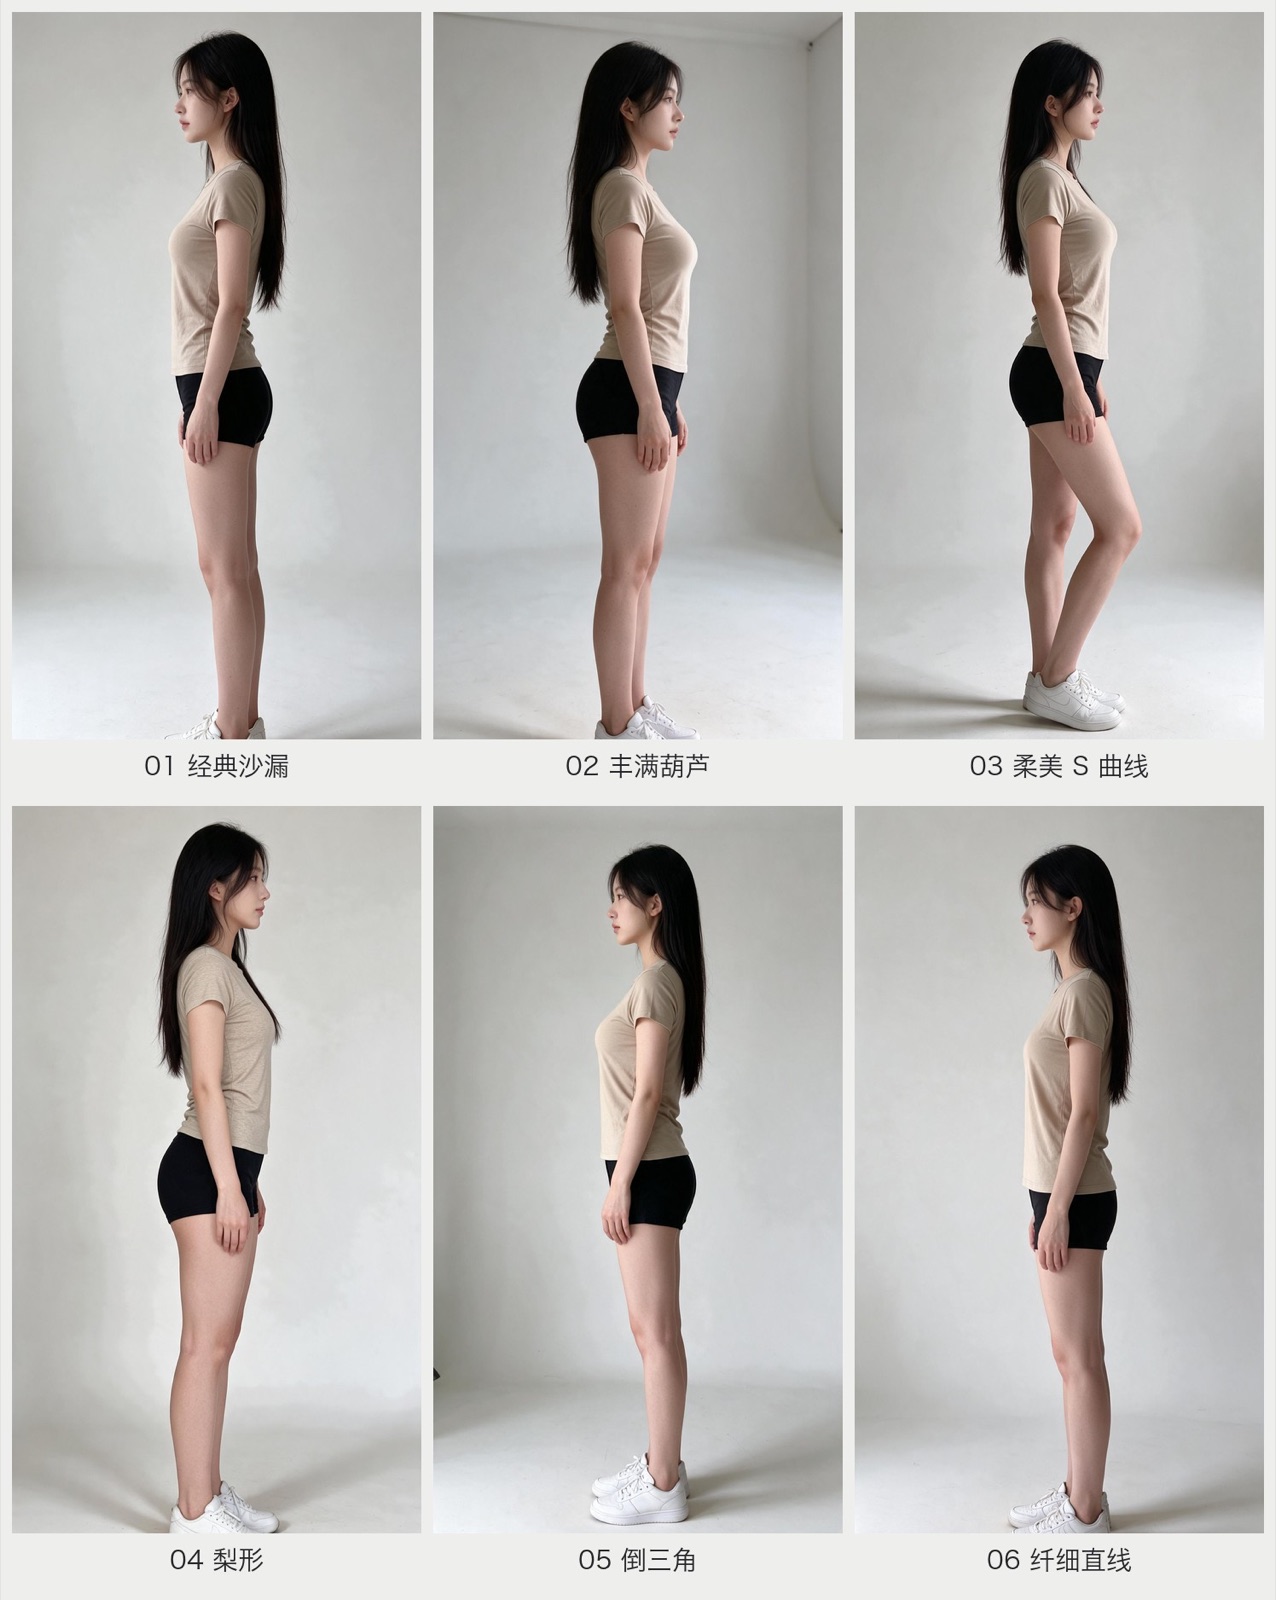
Pair opposing archetypes together for immediate contrast: Curvy Hourglass vs. Straight Column, or Pear vs. Inverted Triangle.
8 Common Mistakes & Fixes
- Face drifts: You likely modified or trimmed Module 2. Keep the identity lock block intact without omitting details.
- T-shirt turns white or cropped: Models love guessing apparel defaults. Explicitly specify
light khaki, standard full length, not cropped, not white. - Short legs or bobblehead: Ensure
7.5 to 8 head ratio, waistline at realistic anatomical height, prohibit ratios exceeding 8.5remain in Module 3. - Exaggerated swayback / lordosis: On curvy and S-curve styles, always specify
healthy anatomical spinal alignment, no hyper-extended lumbar curve. - Inverted triangle renders overly muscular: Always include
preserving soft feminine contours, no exaggerated muscular bulk. - Straight column renders emaciated: Add
retaining healthy natural muscle tone and body fat, avoiding sickly emaciation. - Curvy back view gets blocked by filters: Drop terms like “hyper-wide” or “massive”; use
slender waist, rounded hips, balanced healthy curves. - Footwear clipped on side profiles: Add
head to shoes fully visible in frame, slight breathing room at top and bottom.
Adapting This to Your Own Virtual Human
The real value of this 8-module structure is that each block is independent:
- New Face: Swap the reference image; leave the prompt unchanged.
- New Wardrobe: Replace Module 5 (dresses, denim, athletic wear)—just remember to specify precise lengths and colors.
- New Aesthetic: Adjust Modules 7 and 8 (35mm film, vintage CCD, studio commercial)—leaving identity and body blocks intact.
This system works across any generation tool that supports image-to-image reference conditioning (Seedream, Midjourney with Omni/style references, etc.). The weaker a platform’s native face-lock capability, the more critical your text-based identity lock module becomes.